How to build your own Web-Browser using Python
In this Project-tutorial, we are going to learn how to build our own web-browser called Tanzanite Browser that looks like Google Chrome Browser using a few lines of code in Python.
For this project, we will mainly use the PyQt library package which is a cross-platform GUI toolkit, consisting of a set of python bindings for Qt v5. This package helps you to develop interactive desktop applications with much ease because of the tools and simplicity it provides.
Compared to TKInter, PyQT comes jam-packed with many powerful and advanced widgets.
Requirements:
1 – Python 3.0 and above
2 – PyCharm IDE or Visual Studio Code IDE or any other IDE of your choice
Packages required:
Use the following commands to install the required packages.
pip install PyQt5
pip install PyQtWebEngine
Step 1: Set Up the Environment;
Create a new project in any of your preferred IDE, for our case we chose to use PyCharm IDE and we will name our Project, “Tanzanite Browser“. Feel free to name it anything you prefer.
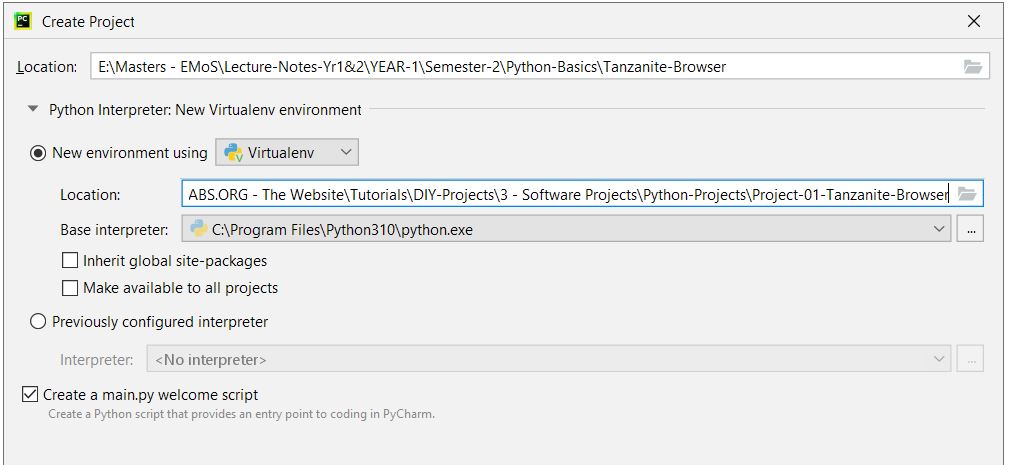
Use the Terminal window within the IDE to install the required packages as shown below;

Step 2: Create the Browser Window;
To begin with, we need to create a Browser window that looks something like this;
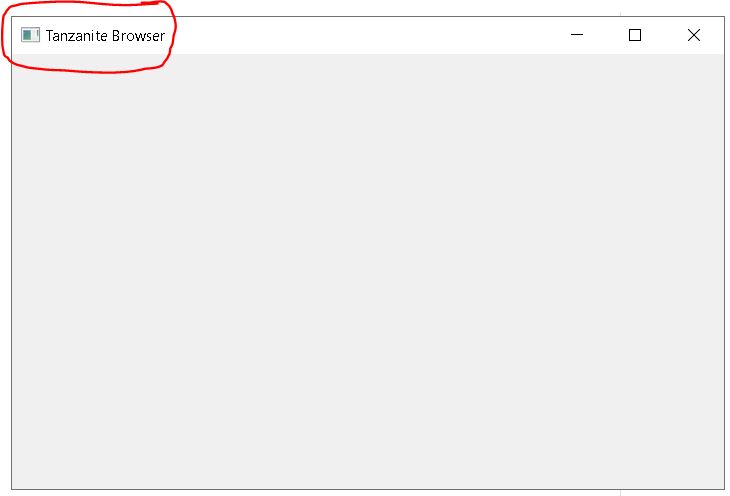
In the code snippet below for the Browser window, we begin by importing the necessary packages that is; “Sys” which is a system library that comes pre-installed whereas “PyQt5” and “PyQtWebEngine” packages need to be installed manually in the Terminal Window of your IDE as shown in the figure-2 above.
import sys
from PyQt5.QtWidgets import *
from PyQt5.QtWebEngineWidgets import *
from PyQt5.QtCore import *

class BrowserWindow(QMainWindow):
    def __init__(self):
        super(BrowserWindow, self).__init__()
        self.browser = QWebEngineView()
        self.setCentralWidget(self.browser)
        self.showMaximized()

app = QApplication(sys.argv)
QApplication.setApplicationName('Tanzanite Browser')
window = BrowserWindow()
app.exec()
In our Browser window, we need to set a default site/landing page and to do this we need to include the following line of code to our function. This could be a site like https://google.com but in our case, we have set our website (https://sonalabs.org) as our default/landing page.
self.browser.setUrl(QUrl('https://sonalabs.org'))This should give us something like this below, upon running the code…

Step 3: Add a Navigation Bar with Menu-Items
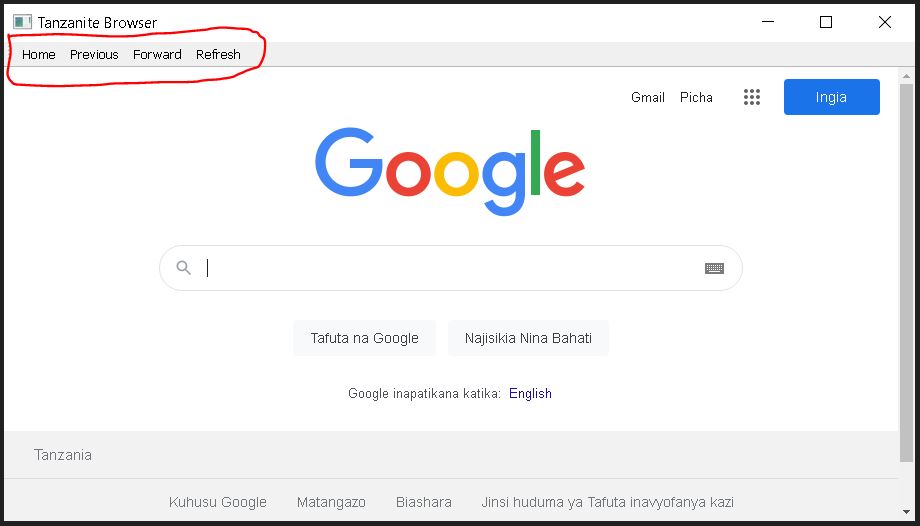
The next step is to create a navigation Bar where our Menu-Items like Home, Previous, Forward, Refresh will be. We use the code below to add the Nav_Bar. Add this code within the function under the class ‘BrowserWindow’.
# Adding a Navigation Bar...
nav_bar = QToolBar()
self.addToolBar(nav_bar)
To add the menu-items, we will begin by adding a home link to the google.com page.
# Function to set Home Page
    def go_home(self):
        self.browser.setUrl(QUrl('https://google.com'))

        # Add a Home Menu-Item
        home_btn = QAction('Home', self)
        home_btn.triggered.connect(self.go_home)
        nav_bar.addAction(home_btn)
Add other menu-items such as “Previous”, “Forward” and “Refresh” – to enable navigation and reload websites while using the Browser.
# Add a Previous Menu-Item
    prev_btn = QAction('Previous', self)
    prev_btn.triggered.connect(self.browser.back)
    nav_bar.addAction(prev_btn)

# Add a Forward Menu-Item
    forw_btn = QAction('Forward', self)
    forw_btn.triggered.connect(self.browser.forward)
    nav_bar.addAction(forw_btn)

# Add a Refresh Menu-Item
    ref_btn = QAction('Refresh', self)
    ref_btn.triggered.connect(self.browser.reload)
    nav_bar.addAction(ref_btn)
We should have something like this…
Step 4: Add a URL Search Bar
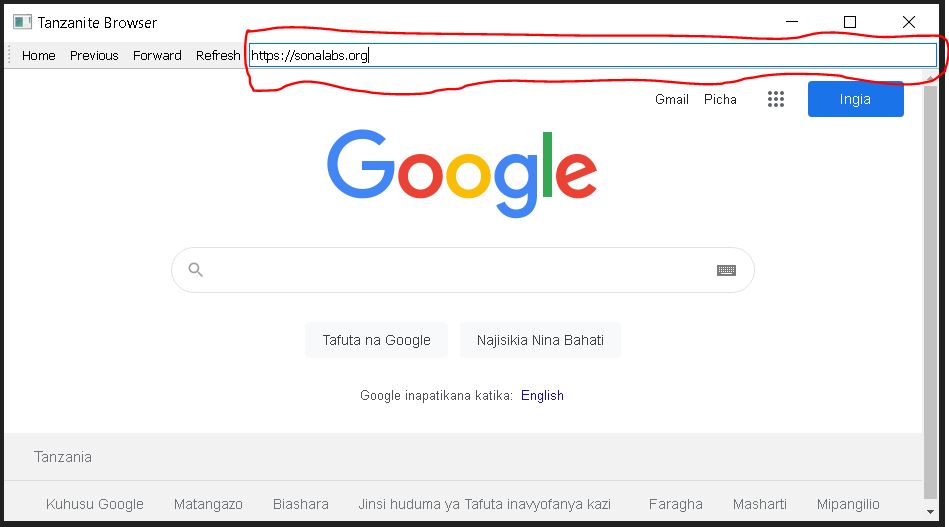
The next thing we need to do is to add a URL Search Bar to allow the user of the Browser to enter their website URL they intend to visit.
# Function to capture URL and retrieve the website
    def go_to_url(self):
        url = self.url_search_bar.text()
        self.browser.setUrl(QUrl(url))

        # Add a URL Search Bar
        self.url_search_bar = QLineEdit()
        self.url_search_bar.returnPressed.connect(self.go_to_url)
        nav_bar.addWidget(self.url_search_bar)
Upon running the above code, we need to get something like this…
Step 5: Update the Search Bar to respond to the Menu-Items.
Lastly, we need to update the URL Search Bar in a way that when we move forward or backwards the former and latter URLs are captured and to do this, we use the following code;
# Function to update URL
    def update_url(self, u):
        self.url_search_bar.setText(u.toString())

        # Update URL on clicking prev & forward
        self.browser.urlChanged.connect(self.update_url)
The Final Code for the Tanzanite Browser should be as shown below;
import sys
from PyQt5.QtWidgets import *
from PyQt5.QtWebEngineWidgets import *
from PyQt5.QtCore import *

class BrowserWindow(QMainWindow):
    def __init__(self):
        super(BrowserWindow, self).__init__()
        self.browser = QWebEngineView() # creating the browser
        self.browser.setUrl(QUrl('https://sonalabs.org'))
        self.setCentralWidget(self.browser)
        self.showMaximized()

        # Adding a Navigation Bar and a menu
        nav_bar = QToolBar()
        self.addToolBar(nav_bar)

        # Add a Home Menu-Item
        home_btn = QAction('Home', self)
        home_btn.triggered.connect(self.go_home)
        nav_bar.addAction(home_btn)

        # Add a Previous Menu-Item
        prev_btn = QAction('Previous', self)
        prev_btn.triggered.connect(self.browser.back)
        nav_bar.addAction(prev_btn)

        # Add a Forward Menu-Item
        forw_btn = QAction('Forward', self)
        forw_btn.triggered.connect(self.browser.forward)
        nav_bar.addAction(forw_btn)

        # Add a Refresh Menu-Item
        ref_btn = QAction('Refresh', self)
        ref_btn.triggered.connect(self.browser.reload)
        nav_bar.addAction(ref_btn)

        # Add a URL Search Bar
        self.url_search_bar = QLineEdit()
        self.url_search_bar.returnPressed.connect(self.go_to_url)
        nav_bar.addWidget(self.url_search_bar)

        # Update URL on clicking previous & forward
        self.browser.urlChanged.connect(self.update_url)

    # Function to set Home Page
    def go_home(self):
        self.browser.setUrl(QUrl('https://google.com'))

    # Function to capture URL and retrieve the website
    def go_to_url(self):
        url = self.url_search_bar.text()
        self.browser.setUrl(QUrl(url))

    # Function to update URL
    def update_url(self, u):
        self.url_search_bar.setText(u.toString())

app = QApplication(sys.argv)
QApplication.setApplicationName('Tanzanite Browser')
window = BrowserWindow()
app.exec()
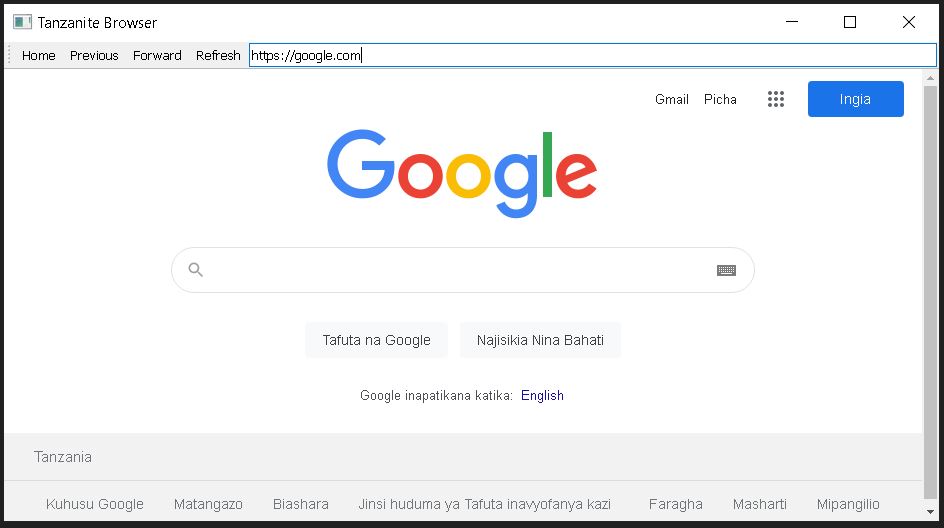
Conclusion:
The final display should look something like this…
References:
[1]. PyQT5 Documentation: https://www.riverbankcomputing.com/static/Docs/PyQt5/
[2]. Sys Documentation: https://docs.python.org/3/library/sys.html
If you liked this project-tutorial, please subscribe to our YouTube Channel for more D.I.Y tutorials and projects.
Leave a comment down below incase you have any concerns…
Follow us on our different social media platforms:- LinkedIn, Facebook, Instagram, TikTok and Pinterest.

About the Author…
Tumusiime Kwiringira a.k.a Tum, is an embedded systems engineer, D.I.Y Life Hacker, Tech Blogger, YouTuber, Founder and Lead-Engineer at sonalabs.org. He’s passionate about innovation and building D.I.Y projects to inspire the young generation in the fields of Mechatronics and Artificial Intelligence… Read more…


