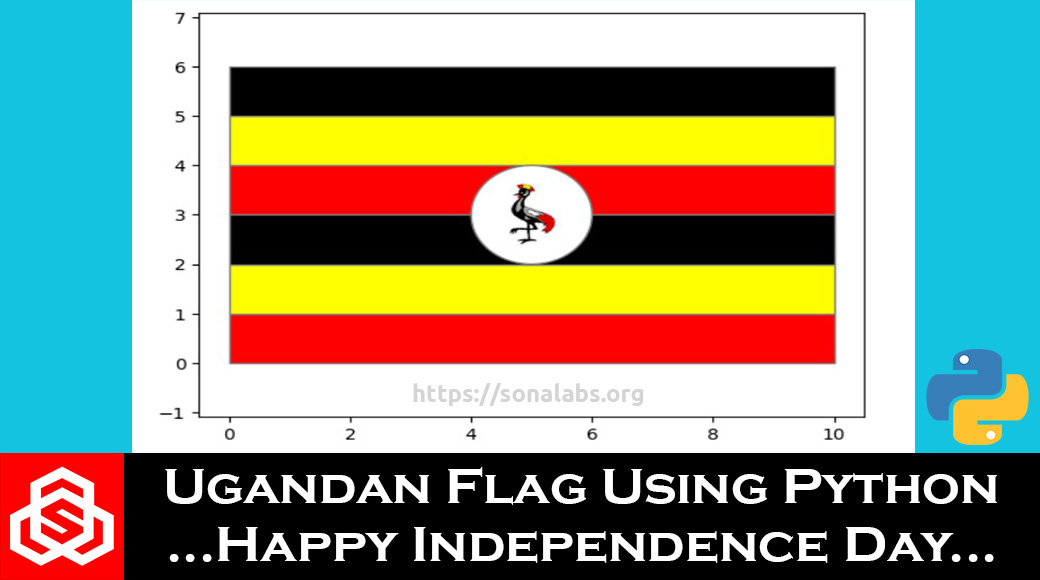
How to create the Ugandan National Flag using Python – Happy Independence Day UG…
In this project-tutorial, you will learn how to create the Ugandan National Flag using Python. Today (9th/October/2023), Uganda celebrates her 61st Independence Day and as a way to celebrate our Independence day as Ugandans, we decided to share with you how you can create our National Flag using the Python Language.
Requirements:
- Python Programming Language (python3)
- Google Colab
- Python Libraries (Numpy, Matplotlib, & Pillow)
So to create the Ugandan National Flag using Python and Google Colab, we will be following the steps below;
Step-1: Import all the required Libraries…
In the first cell, we will begin by importing various python libraries that are needed throughout the code as below;
# Import the required libraries...
import numpy as np
import matplotlib.pyplot as plt
import matplotlib.patches as patches
from matplotlib.animation import FuncAnimation
from matplotlib.offsetbox import OffsetImage, AnnotationBbox
from google.colab import files
from PIL import Image
import io
Each imported library is required for a specific use;
numpyis imported asnpfor numerical operations.matplotlib.pyplotis imported aspltfor creating plots.matplotlib.patchesis imported aspatchesfor drawing shapes on the plot.matplotlib.offsetboxis imported for working with images and annotations.google.colab.filesis imported to enable file upload in Google Colab.PILis imported from thePILlibrary for working with images. (Use !pip install pillow) to install it first.iois imported for input/output operations.
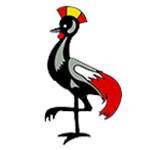
Step-2: Upload the Crested-Crane Image
In the next cell, we use the files.upload() function from Google Colab to prompt the user to upload an image from their local machine.
# Upload an image from your local machine
uploaded = files.upload()
You can used the Image below of the Crested Crane. Please ensure to use an image editing software like Photoshop or any or your choice and put the image in a round shape with a white background.
Step-3: Get the Filename of the Uploaded Image
Create a new cell to get the filename of the uploaded image.
# Get the filename of the uploaded image
uploaded_filename = list(uploaded.keys())[0]
This cell retrieves the filename of the uploaded image from the dictionary returned by files.upload(). It assumes that only one file was uploaded.
We will be writing the next lines of code in the same cell created above.
Step-4: Set the Filename to a Specific Value
# Set the filename to a specific value (in this case, "ug-she-crane.jpg")
uploaded_filename = "ug-crane.jpg"
Here, the code manually sets the uploaded_filename variable to a specific filename, “ug-crane.jpg“. This is done to ensure that a specific image is used consistently in the code.
Step-5: Define the Colors of the Ugandan Flag
# Define the colors of the Ugandan flag
colors = ['#FF0000', '#FFFF00', '#000000', '#FF0000', '#FFFF00', '#000000']
This block of code defines a list of colors representing the colors of the Ugandan flag. The list contains six colors, alternating in the pattern of black, yellow, and red.
Step-6: Create a Figure and Axis for the Plot
# Create a figure and axis for the plot
fig, ax = plt.subplots()
Here, a Matplotlib figure (fig) and axis (ax) are created, providing a canvas for the plot.
Step-7: Create Colored Rectangles for Each Stripe
# Create colored rectangles for each stripe of the Ugandan flag
for i, color in enumerate(colors):
    rect = patches.Rectangle((0, i), width=10, height=1, facecolor=color, edgecolor='gray')
    ax.add_patch(rect)
- This block of code uses a loop to create six colored rectangles, each representing a stripe of the Ugandan flag.
- The
enumeratefunction is used to iterate through both thecolorslist and the corresponding indexi. patches.Rectangleis used to create a rectangle with specified coordinates, width, height, face color, and edge color.- Each rectangle is added to the plot using
ax.add_patch.
Step-8: Define the Size and Position of the Crested Crane Emblem Circle
# Define the size and position of the emblem (crested crane) circle
crane_size = 2
crane_x = (10 - crane_size) / 2
crane_y = 2
- In this block of code, the size,
crane_size, and position,crane_xandcrane_y, of the crested crane emblem circle are defined. crane_sizerepresents the diameter of the circle.crane_xis calculated to place the circle in the middle of the flag (assuming the flag width is 10 units).crane_yis the initial y-coordinate of the circle.
Step-9: Create an Ellipse (Circle) for the Crested Crane Emblem
# Create an Ellipse (circle) for the emblem with specified properties
crane = patches.Ellipse(
    (crane_x + crane_size / 2, crane_y + crane_size / 2),
    width=crane_size,
    height=crane_size,
    facecolor='#FFFFFF',  # White color
    edgecolor='gray'
)
ax.add_patch(crane)
- In this block of code, an elliptical patch is created using
patches.Ellipseto represent the white circle in the middle of the flag. - The
Ellipseis positioned at(crane_x + crane_size / 2, crane_y + crane_size / 2), which is the center of the circle. - The
widthandheightparameters are set tocrane_sizeto make it a circle. facecoloris set to white ('#FFFFFF'), andedgecoloris set to gray, determining the colors of the circle.
Step-10: Load and Open the Emblem (Crested Crane) Image
# Load and open the emblem (crested crane) image
emblem_image = Image.open(uploaded_filename)
- This line of code loads and opens the emblem image using the
Image.openmethod from the Pillow library. - The image file to be opened is specified by
uploaded_filename.
Step-11: Calculate the Position for Placing the Emblem Image
# Calculate the position for placing the emblem image within the circle
emblem_x = crane_x + crane_size / 2
emblem_y = crane_y + crane_size / 2
- Here, the code calculates the position (
emblem_xandemblem_y) where the emblem image should be placed within the circular emblem. emblem_xis set to the x-coordinate of the center of the circle.emblem_yis set to the y-coordinate of the center of the circle.
Step-12: Create an OffsetImage with the Emblem Image
# Create an OffsetImage with the emblem image and desired zoom level
emblem = OffsetImage(emblem_image, zoom=0.5)
- In this line of code, an
OffsetImageis created with theemblem_imageloaded earlier. - The
zoomparameter is set to 0.5, which means the image will be scaled down to half of its original size.
Step-13: Create an AnnotationBbox to Place the OffsetImage on the Plot
# Create an AnnotationBbox to place the OffsetImage on the plot
emblem_box = AnnotationBbox(emblem, (emblem_x, emblem_y), frameon=False)
ax.add_artist(emblem_box)
- Here, an
AnnotationBboxis created to position theemblemimage on the plot. - The
(emblem_x, emblem_y)coordinates determine the position of theemblemimage within the circle. frameon=Falseensures that there won’t be a frame or border around theemblemimage.
Step-14: Set Equal Aspect Ratio for the Plot and Display the Axes
# Set equal aspect ratio for the plot and display the axes
ax.axis('equal')
plt.axis('on')
- Here the aspect ratio of the axis is set to ‘equal’ using
ax.axis('equal'). This ensures that the plot maintains its proportions. plt.axis('on')is used to display the axes on the plot.
Step-15: Display the Final Plot
# Display the final plot
plt.show()
Finally, this line of code displays the completed plot with the Ugandan flag and the crested crane emblem in the middle within the Colab Environment using plt.show().
Here is the full code;-
Upon putting together all the steps above, we have the final code as shown below…
# Import the required libraries...
import numpy as np
import matplotlib.pyplot as plt
import matplotlib.patches as patches
from matplotlib.offsetbox import OffsetImage, AnnotationBbox
from google.colab import files
from PIL import Image
import io

# Install the Pillow library
!pip install pillow

# Upload an image from your local machine
uploaded = files.upload()

# Get the filename of the uploaded image
uploaded_filename = list(uploaded.keys())[0]

# Set the filename to a specific value (in this case, "ug-crane.jpg")
uploaded_filename = "ug-crane.jpg"

# Define the colors of the Ugandan flag
colors = ['#FF0000', '#FFFF00', '#000000', '#FF0000', '#FFFF00', '#000000']

# Create a figure and axis for the plot
fig, ax = plt.subplots()

# Create colored rectangles for each stripe of the Ugandan flag
for i, color in enumerate(colors):
    rect = patches.Rectangle((0, i), width=10, height=1, facecolor=color, edgecolor='gray')
    ax.add_patch(rect)

# Define the size and position of the emblem (crested crane) circle
crane_size = 2
crane_x = (10 - crane_size) / 2
crane_y = 2

# Create an Ellipse (circle) for the emblem with specified properties
crane = patches.Ellipse(
    (crane_x + crane_size / 2, crane_y + crane_size / 2),
    width=crane_size,
    height=crane_size,
    facecolor='#FFFFFF',  # White color
    edgecolor='gray'
)
ax.add_patch(crane)

# Load and open the emblem (crested crane) image
emblem_image = Image.open(uploaded_filename)

# Calculate the position for placing the emblem image within the circle
emblem_x = crane_x + crane_size / 2
emblem_y = crane_y + crane_size / 2

# Create an OffsetImage with the emblem image and desired zoom level
emblem = OffsetImage(emblem_image, zoom=0.5)
# Create an AnnotationBbox to place the OffsetImage on the plot
emblem_box = AnnotationBbox(emblem, (emblem_x, emblem_y), frameon=False)
ax.add_artist(emblem_box)

# Set equal aspect ratio for the plot and display the axes
ax.axis('equal')
plt.axis('on')

# Display the final plot
plt.show()
Final Output
Upon running the last cell of the code above, you should be having the output of the Ugandan National Flag as shown below in the Colab Environment;
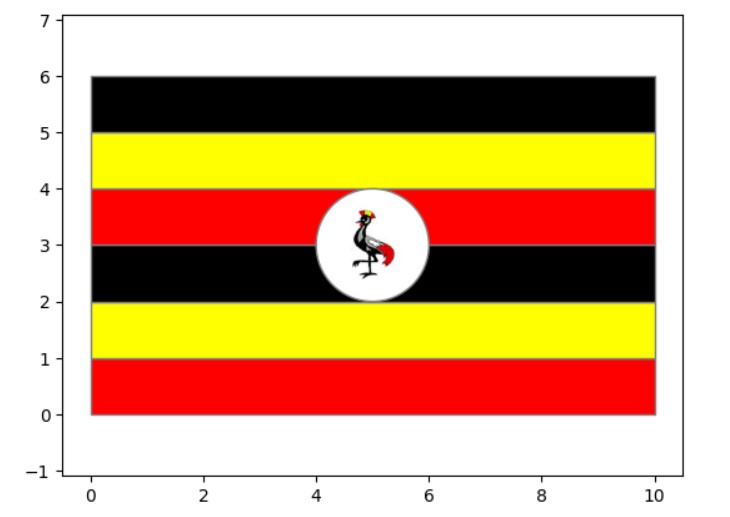
Conclusion
The code above generates a plot representing the Ugandan National Flag with a circular emblem (the crested crane) placed in the middle as it is on the real physical Flag. The python code uses various libraries and functions from Matplotlib, Pillow (PIL), and Google Colab was used to achieve this visualization. Each step is carefully designed to upload, process, and display the image and plot components correctly. Have fun creating your Country’s National Flag…
If you liked this project-tutorial about creating the Ugandan National Flag using Python,
then please subscribe to our YouTube Channel for more D.I.Y projects-tutorials.
Leave a comment down below incase you have any questions about this project-tutorial.
Follow us on our different social media platforms;-
LinkedIn, Facebook, Instagram, TikTok, & Pinterest.

About the Author…
Tumusiime Kwiringira a.k.a Tum, is an embedded systems engineer, D.I.Y Life Hacker, Tech Blogger, YouTuber, Founder and Lead-Engineer at sonalabs.org. He’s passionate about innovation and building D.I.Y projects to inspire the young generation in the fields of Mechatronics and Artificial Intelligence… Read more…